

Steam Deck is by nature a tiny gaming PC with a gamepad built-in, featuring a “Gaming Mode” for people who want a console-like experience instead of the traditional PC “Desktop Mode”. But it’s hard to imagine people can live without their non-Steam game collection, or games that were not yet compatible with SteamOS’s default Proton layer. More often than not, you would find yourself regularly switch back and forth between the two modes, and working in Desktop Mode on that tiny 7-inch display is anything but ideal. It would also require you to have a physical keyboard if you don’t want to use the virtual one that takes up 50% of the screen. That sounds a lot of work for gaming.
Luckily, since SteamOS 3.x is just a customized version of Arch Linux, we can use existing Linux tools to make our lives a bit easier by doing everything remotely on your computers.
Switch to Desktop Mode
In order to install any non-Steam software, we would need to switch to Desktop Mode. On your Steam Deck press the  button, then select “Power > Switch to Desktop” from the menu.
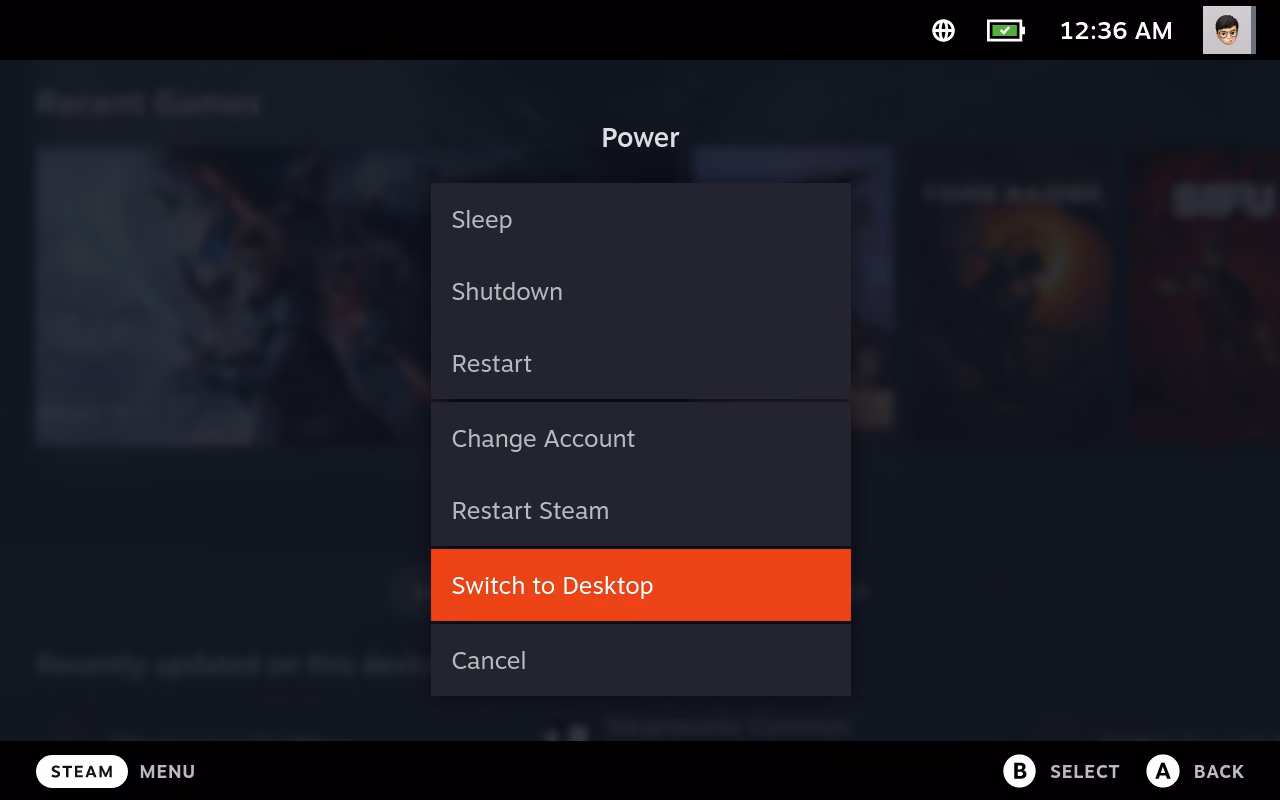 Press the Button > Power > Switch to Desktop.
Set an user password
The default user account (deck) of the Desktop Mode does not have its password set. But it would be required later so we’d have to set one first. This can be done with the SteamOS graphical interface (GUI). It’s preferably to have an external keyboard for this process, but you can always use +  button on the gamepad to bring up the on-screen keyboard if you don’t.
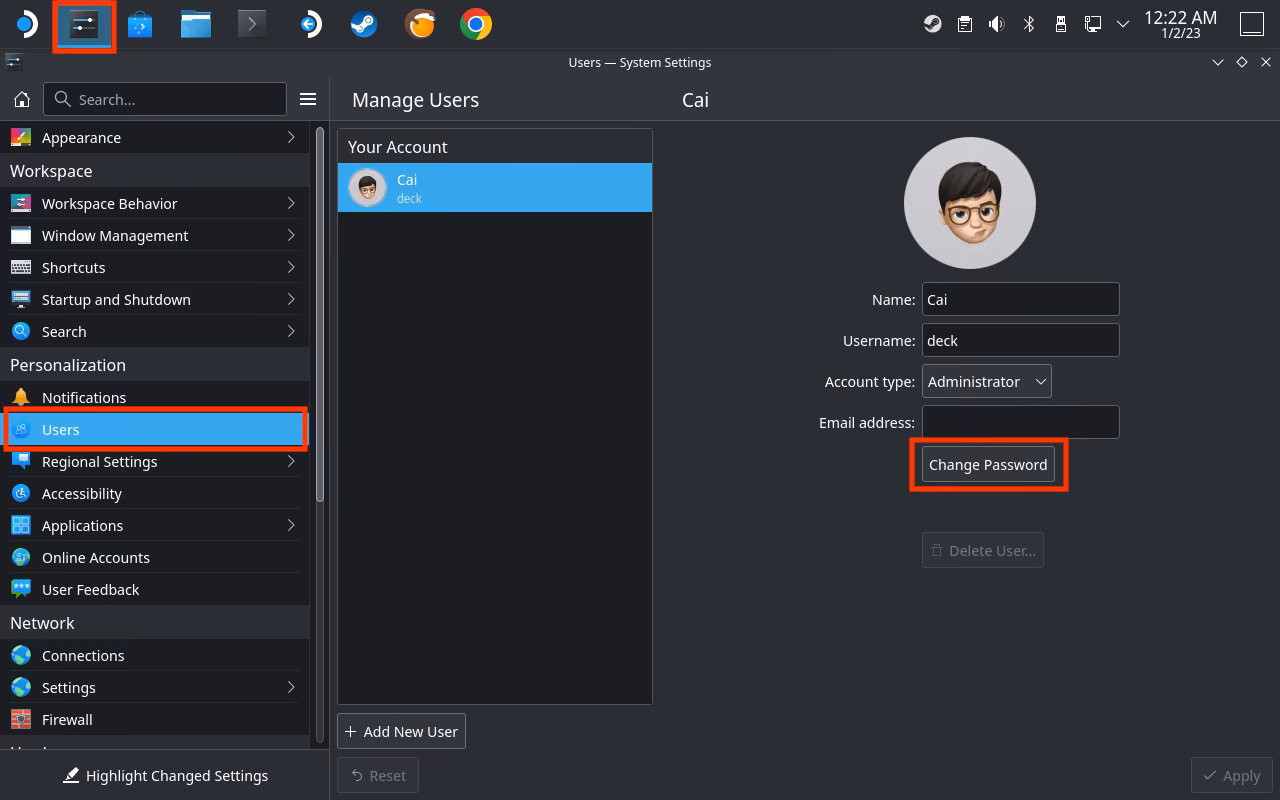 Set the password via “Application Launcher > Settings > System Settings > Users > Your Account > Change Password”.
If you prefer the CLI, it could also be done with passwd command via Konsole (can be found at “Application Launcher > System > Konsole”). Note that the entered password will not show, just type in your password and hit [Enter] on your keyboard when you finished:
(deck@steamdeck ~)$ passwd
New password:
Retype new password:
passwd: password updated successfully
Enable Secure Shell (SSH)
From Wikipedia:
The Secure Shell (SSH) Protocol is a cryptographic network protocol for operating network services securely over an unsecured network. Its most notable applications are remote login and command-line execution.
SteamOS has SSH service built-in but disabled for security reasons, you can choose to enable it if you want to remote access your Deck via CLI from your computer. This step is optional.
To enable it, use the following command in the Konsole and enter the password we set in the previous step when prompted:
(deck@steamdeck ~)$ sudo systemctl enable sshd.service
Created symlink /etc/systemd/system/multi-user.target.wants/sshd.service → /usr/lib/systemd/system/sshd.service.
(deck@steamdeck ~)$ sudo systemctl start sshd.service
“Enable” means the service will start automatically on next boot, while “start” means it will start for the current session. To disable or stop the service, just change the enable/start in the commands accordingly. For security reasons, it’s recommended to have it turned off when not using it.
Decky Loader
Since SteamOS update will restore any system changes except /home, those changes will need to be re-applied after each system update. If you don’t want to do this repeatedly (for the record, SteamOS has 90 updates during the first year), consider install “Decky Loader” and the “System Toolbox” plug-in so you can control SSH on/off directly from the Gaming Mode and not have to worry about system updates.
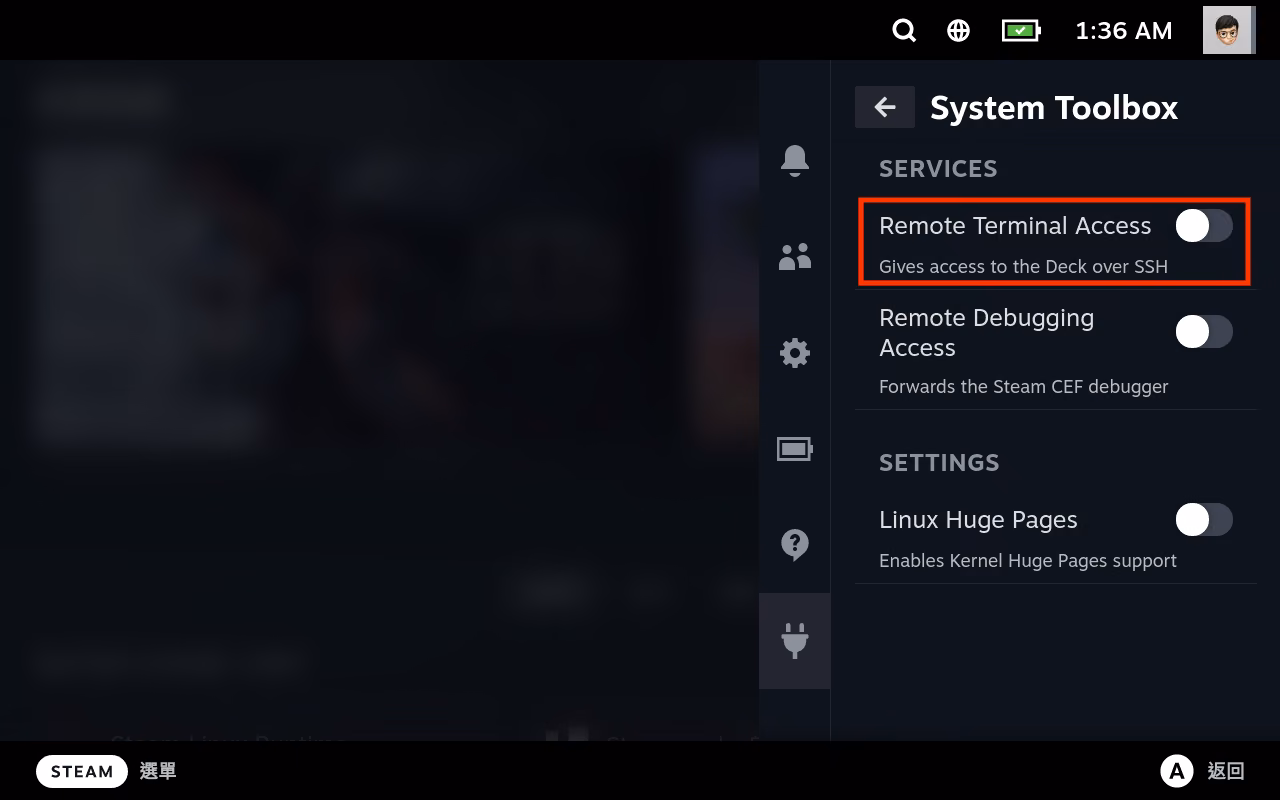 System Toolbox plug-in of Decky Loader.
Setup Virtual Network Computing (VNC)
From Wikipedia:
Virtual Network Computing is a graphical desktop-sharing system that uses the Remote Frame Buffer protocol to remotely control another computer. It transmits the keyboard and mouse input from one computer to another, relaying the graphical-screen updates, over a network.
In short, it let you remote access your Steam Deck’s Desktop Mode graphical interface remotely with your computer. SteamOS currently does not have any VNC server built-in or available via its Flathub app store, so we would have to install it via pacman - Arch Linux’s package manager.
Since this process is tedious and has to be done repeatedly after each system update, here’s a script for just that. Simply copy and paste the command below into Konsole and run it (Internet connection is required. Also the GitHub URL to the script is lengthy, you can open this blog post with your Steam Deck’s browser to copy it instead of typing, or run it via SSH):
sh -c "$(curl -fsSL https://gist.githubusercontent.com/x43x61x69/9a5a231a25426e8a2cc0f7c24cfdaed9/raw/vnc_install.sh?$RANDOM)"
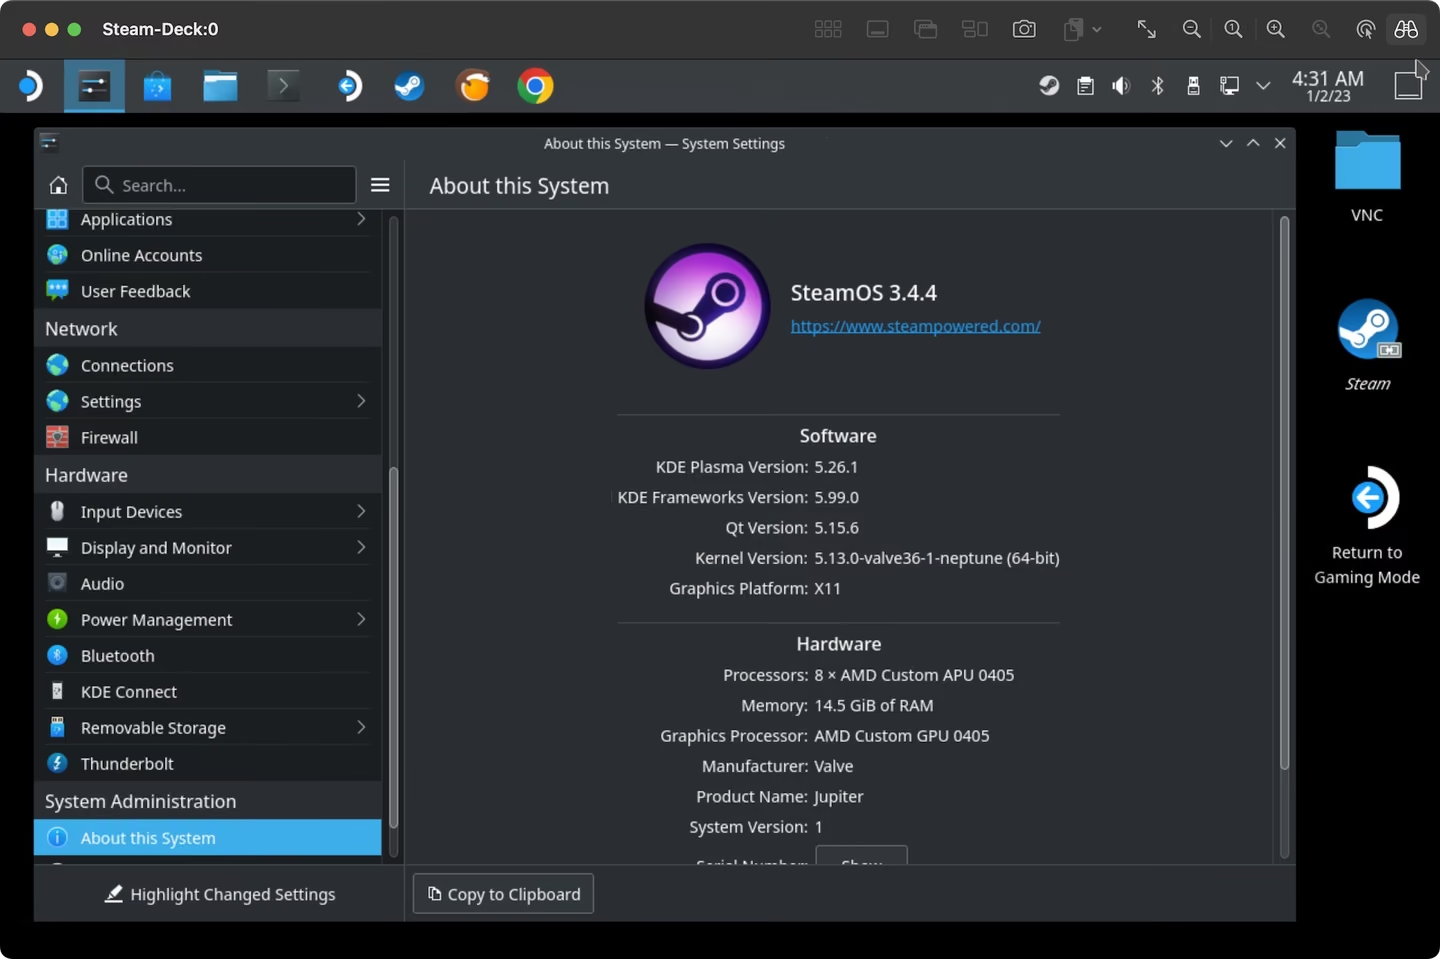
The script will create a shortcut for reinstallation, you don’t have to copy paste this command in the future. Once done, a new “VNC” folder will appear on your desktop and contains all the necessary features that you might need. You can double click on each shortcut when needed, e.g. double click the “Start VNC” will start the VNC server (nothing will show up but it’s indeed running). Now use a VNC client on your computer to connect to it via IP address. For macOS, there’s built-in VNC viewer named “Screen Sharing”:
 Remote access Steam Deck with macOS Screen Sharing.
What this script does?
- Automatically enable/disable SteamOS system read-only protection for you.
- Initialize
pacmankeys. - Install x11vnc server.
- Create shortcuts for enabling/disabling VNC.
- Create a shortcut for VNC password resetting.
- Create a shortcut for easy reinstalling x11vnc after system updates.
- Create script for auto start VNC server on login.
It’s safe for re-running, so don’t worry if not succeeded during initial attempts.
Auto start on startup
Some people would recommend you to setup a system service to have VNC server start on startup automatically. But for the sake of simplicity, I would suggest set it up with the GUI:
- Application Launcher > System > System Settings > Startup and Shutdown > + Add… > Login Script.
- Select the “
vnc_startup.sh” within the VNC folder on your desktop.
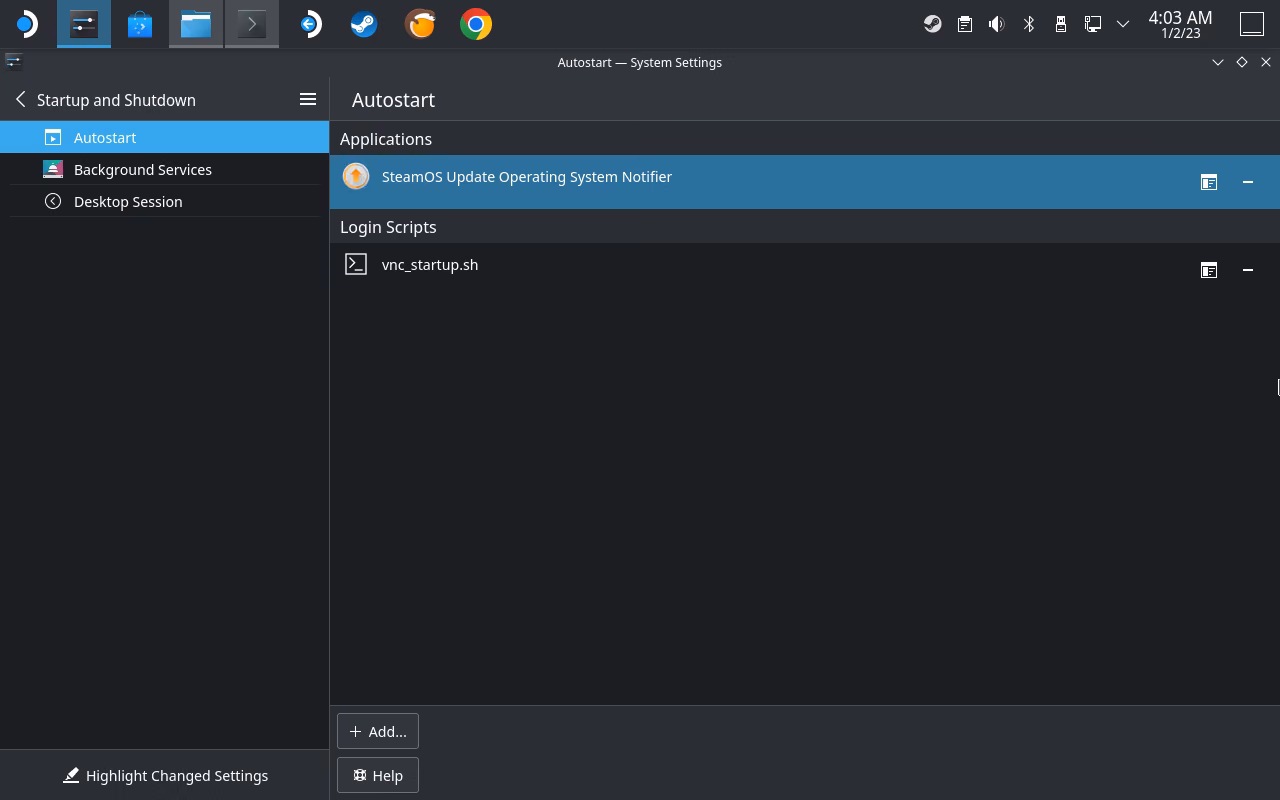
Of course, this is complete optional. You can always use the shortcuts to start/stop the VNC server manually.
